

Updated: April 2026
What are the best camera settings for horse photography?
Without doubt this is the question I am asked most often. Here is a quick summary before we dive in to the detail.
Here is your quick summary.
For most horse photography, use shutter speeds of 1/1000s or faster, an aperture of f/4–f/5.6 to ensure we get the whole horse in focus, continuous autofocus (AF-C), using manual exposure. Set the ISO to keep the shutter speed and aperture a those settings – they are more important. The exact settings vary a little by discipline, more on that later.
I will cover:
- What is Horse Photography
- Where Should you buy Camera Equipment from?
- Choosing the Right Camera for Equine Photography
- The best lenses for horse photography
- RAW vs JPEG for Equestrian Photography
- Exposure Modes Explained
- Autofocus Settings for Horse Photography
- Camera Settings by Discipline
- Cross Country
- Showjumping
- Dressage
- Racing
- Polo
- Common Mistakes and how to fix them.
At the start of each section I will give you my setting choice in case you are in a hurry.
What is horse photography?
If you join some groups on social media you could be forgiven for thinking that horse photography is equine portraiture alone. The truth, though, is that equine photography, or whatever you choose to call it, is a very very broad and varied subject.
In this article I will describe how some of the different equine disciplines require different tools and techniques, but in no way will I pretend to cover them all. Many of the principles will transfer, some will not!
Where Should you buy Camera Equipment from?
Everybody has a favourite place to buy their camera equipment from.
I’m in the UK and I buy all my equipment from two places: WEX Photo Video or MPB.com.
Choosing the Right Camera for Equine Photography
QUICK VERSION: Any modern DSLR or Mirrorless camera (see notes below)
Within reason, any camera body should be fine for photographing horses.
I say within reason, because it needs to be able to either autofocus reasonably quickly or allow the user to manually focus. It also needs to be able to carry (or have built-in) a lens of 70mm or more.
DSLR vs Mirrorless — which is better for horse photography?
Most people I work with use mirrorless cameras, where the image seen through the viewfinder is the one recorded by the sensor. The ability to see the photo you are going to get is a huge bonus, and worth having.
Mirrorless is a fast-moving technology and we now have some game-changing bodies on the market from Nikon (Z9), Canon (R1) and Sony (A1 II) which have great battery life and reasonable focusing in dark situations – problems mirrorless cameras suffered from previously. An added advantage of these is that the new autofocusing mechanisms with great eye-detection systems improve their usefulness for video too, and in these times of social media obsession with video, this can be very useful.
Don’t panic though. Although these cameras are very expensive, each of these manufacturers has other camera bodies which are much more affordable and still excellent for equestrian photography. The NIkon Z8 and Z6 III both fall into this category, as do the Canon R5 and R6 models, and the Sony A7 and A9 variations.
If you are starting equine photography on a budget, then look for a secondhand dSLR. These are the mirrored camera we all used to use a few years ago and they still perform brilliantly, especially some particular models designed for low light. The recent NASA Artemis II mission to the other side of the moon used a mirrored Nikon D5 as well as a Nikon Z9. The former cost about a sixth what the latter cost.
How many megapixels do you actually need?
One word of warning though. Don’t be too obsessed with pixel count. You don’t need 45-60 megapixel cameras for your equine photography, and by choosing one of these you are reducing the cameras performance in some situations.
The camera I use has 45MP, but that badly affects its performance in low light. I almost prefer it had only 25MP, as the Canon R1 does.
Frame rate — why it matters more than resolution
Another downfall of high-pixel cameras in their slow frame rate. We don’t need 20 frames per second or more, but it is nice to have 10 or more for some disciplines, and high megapixel cameras tend to be more in the 5-10 category, especially when you are shooting RAW.
Body Size – why is it relevant?
Cameras tend to come in two body types, those with a portrait grip built in, and those without.
The bigger bodies have a second set of buttons ready for where your fingers naturally grip the camera when shooting in portrait orientation. You simply turn the body in your hands 90 degrees anti-clockwise and there is a second shutter button, a second ISO button, exposure compensation etc.
These bigger bodies have more space for batteries and therefore the batteries are bigger and last a lot longer. They also have room for professional features like ethernet sockets and remote trigger connections which some of the other cameras don’t have room for.
The downside, a considerable one, is weight. The Nikon Z9 is 430g heavier that the Z8 and has almost the same set of features (the Z8’s smaller battery and lack of a ethernet port being the most significant, but there are ways round this). If you have smaller hands or want a lighter camera, try the smaller format bodies and add a battery/portrait grip later if you want to.
Recommended camera bodies in 2026
High End: Canon R1, Nikon Z9, Sony A1/A9 III. All Excellent.
Slightly cheaper: Nikon Z8, Canon R3/R5 II, Sony A7 IV.
Even Cheaper: Nikon Z6 III, Canon R6 III.
One last caveat. Before you go out and buy a camera body, be aware that you will almost certainly stay with the brand you buy. Some manufacturers offer different lenses to others, and if you want to use a specific lens you might need to opt for that body manufacturer too. For example, the Canon 100-400mm lens is relatively affordable at Don’t be taken in by social media influencers who are being paid to persuade you to buy a camera which might not be the best for you.
The best lenses for horse photography
QUICK VERSION: Perfect: prime lens with focal length greater than 70mm. Good: a zoom lens like a 70-200mm or 70-300mm
The one lens every equestrian photographer needs
The key reason for using SLR cameras, mirrorless or otherwise, is because they have interchangeable lenses. We can choose the right tool for each job, dependent on the situation.
If you have to choose a single lens, then the 70-200mm F2.8 is my go-to lens for nearly all equestrian photography. It lives on my main camera body.
When to use a prime lens
A prime lens is one which has a fixed focal length e.g. 85mm or 300mm.
If you are only photographing one fence or situation and don’t intend to move very far then you might get away with a prime lens, which is great; they have fabulous quality. However, in the vast majority of situations you will want to experiment with different horizontal and vertical shooting angles, or indeed fences (e.g. showjumping) and may be taking each shot from a different distance, so a good quality zoom is perfect.
A good situation where a prime lense can really excel is indoors in low light. Here the maximum aperture of a prime lens gives you a clearer view of the action and lets more light into the lens.

When you need something longer
Equestrian disciplines which require the photographer to be further away from the horse may need longer lenses. I’m afraid a 70-200mm won’t be much good to you when photographing polo, for example.
Big arenas need bigger lenses and sadly they are much more expensive so if big arena show jumping or polo is your thing then make sure the lens you want is available for the camera you buy.
Wide angle — when and why
Likewise, there will be times when an artistic wide angle could make for a good shot, like with the featured image for this article or for use with a remote camera – another topic entirely. You will acquire lenses over time.
RAW vs JPEG for Equestrian Photography
QUICK VERSION: RAW, unless you have to print on site, in which case JPG.
If I am shooting for editorial, commercial or private client purposes then I will always shoot RAW, to give me the most information to work with when editing the file. This can make a big difference with high contrast situations, where deep shadow and/or highlights might need attention.
If I am shooting at shows for event photographers then they need to be able to take my card and send the images straight to the viewing screens without editing so JPEG is the only option. This also reduces file sizes which is important with modern camera sensor resolutions.
Exposure Modes Explained
QUICK VERSION: Shoot in Manual. Shoot in Manual and use Auto-ISO if you don’t want to worry about exposure.
Why you should avoid Auto mode
Leave the P and Auto (green box) setting well alone. Clever as modern cameras are they will get confused by most of the situations we face as equine photographers.
Don’t panic though, there are several ways to use the camera’s technology help if you are not completely comfortable using Manual mode.
Shutter Priority Mode (S on a Nikon, Tv on a Canon) – when it works and when it doesn’t
If you are happy for your camera to choose your aperture for you then you can choose Shutter Priority mode, where you set the shutter speed you want and let the camera do the rest.
So what shutter speed for horse photography?
if the horse you are photographing is stationary then you can go lower but In general we will want to set your shutter speed at 1/800s or greater.
Set your ISO at a suitable level which takes into account the lighting conditions but also doesn’t go higher than it needs to be. If you are lucky enough to use a modern DSLR with good low noise levels at high ISO settings then you could go as high as 4000/6400 or higher and still get a usable result.
Pros: less to think about so you can concentrate on panning and framing your shot. You can be confident your subject will be sharp.
Cons: If the light levels drop then you can end up underexposing your shot
Aperture Priority Mode (A on a Nikon, Av on a Canon) — the depth of field question
If you are happy for your camera to choose your shutter speed for you then set your aperture at f4, f5 or f5.6 and set your ISO at a suitable level which takes into account the lighting conditions but also doesn’t go higher than it needs to be. If you are lucky enough to use a modern camera with good low noise levels at high ISO settings then you could go as high as 4000/6400 or higher and still get a usable result.
I often get asked why I don’t take advantage of the wider apertures that my lenses offer. Why don’t I shoot at f2.8 or wider?
Two reasons. First, at their widest apertures lenses do not perform at their best. I won’t go into the details but in a nutshell lenses are generally much sharper when they are a stop or two away from their widest aperture, hence my choice of f4-f5.6. Secondly, we have to worry about depth of field. A horses is not a flat object and in order to get the whole horse (or at least the most important bits, the head or horse and rider) in focus we need a depth of field of a 2-3 feet. A wide aperture will only give you that sort of depth of field when the subject is a very long way away.
Example: at 200mm and f4 I get about 3ft of depth of field when the subject is 40 feet from the camera, and roughly the same at 100mm and f4 when the subject is closer, say 20ft.
Pros: less to think about so you can concentrate on panning and framing your shot. Control of the amount of depth of field to blur backgrounds if necessary.
Cons: If light levels increase you might reach the maximum possible shutter speed for your camera and overexpose your shot. If light levels drop you might end up using a low shutter speed and find it difficult to keep the horse sharp and blur-free.
Manual Mode (M) — the professional’s choice
Manual mode scares a lot of users and understandably so. With practice and experience, though, it has many benefits over the automatic and semi-automatic modes.
Cameras want to average out all the images they take to a middle grey. Take a picture in an automatic mode of a white board and it will come out grey. Do the same with a black board and it will come out grey. With horses this presents a problem, as they are rarely the same colour. Horse arenas often have white boards, white tents, white fence wings and lots of other lighter shades around them. As a results a camera in any automatic mode will rarely “guess” the exposure correctly. Also, lighting doesn’t tend to change very fast, giving manual users a chance to adapt and alter their settings if a cloud comes over. Almost every professional I know shoots in manual.
A few tips for shooting in manual:
Lush green grass has a pretty close luminance level to middle grey. In the UK during the Summer months it is 1/3 of a stop or 2/3 stop lighter than middle grey.
- Take a photograph of a nice even patch of green grass at the same angle from you as the horse.
- Adjust the exposure until the big peak in the histogram on your camera is 1/3 or 2/3 above the middle point on the graph.
- Now re-frame your photograph around where the horse will be. Take another and make sure there are no blown highlights or too many blacks.
Now you have a pretty good starting point you can adjust slightly when the first horse appears. The great thing is that whatever colour the horse is you know your image is going to correctly exposed.
Pros: you are in complete control of your camera.
Cons: you are in complete control and if the light changes you are responsible for adjusting.
Manual with Auto ISO — the best of both worlds?
If manual mode scares you too much switch on Auto-ISO on your camera while in manual.
Pros: you will now have the control over the shutter speed (to make sure there is no motion blur) and aperture (to keep enough of the horse in focus but no more) and the camera can adapt by using the ISO scale. With Nikon models (I can’t speak for Canon) the increments with which the camera changes the ISO are smaller than the usual 1/3 stop, so the results have the potential to be very accurate.
Cons: If you shoot a very dark horse or a very light horse the camera will still get the exposure wrong.
Autofocus Settings for Horse Photography
QUICK VERSION: Continuous AF/Servo
Why continuous AF is non-negotiable
One of the most important camera settings for horse photography is the autofocus setting.
I sometimes stand next to pro photographers who have a camera which is beeping when they focus.
This tells me two things. First, that it isn’t the first thing they switch off on a new camera, like it is for me, and second, that they are shooting in one-shot/single AF mode. This is no problem with a static target but if your equine subject is moving, the focus (boom) of this article, then by the time you finish pressing the shutter, the horse will have moved and your focal point might not be where you want it anymore.
Set you autofocus mode to AF-C or Servo so it continually focuses and even predicts focus when the shutter release is pressed.
AF point selection — single point vs zone
QUICK VERSION: Single point or small “smart” point group
Before I start, if you are using a reasonable aperture of f5.6/f6.3 then leaving your cameras autofocus target in the default position in the centre of the frame will be fine. Your depth of field will cover the horse and rider. If you need to shoot wider then being able to choose your focus target is vital.
Move your focus point to where the required target is going to be in the frame before the horse arrives. Mentally picture where the rider or horse’s head will be and move the focus point in the viewfinder to that position. Then, as the horse and rider approach, position the focus point on the target and start focusing as you pan through the scene.
In terms of AF point modes, I use single point or what Nikon call D9. This stands for nine-point dynamic mode. If I waver with my focus point as I am planning, the camera will move to the focus point next to the one I chose in order to stay in the subject which the middle.point was originally on. Useful in high speed situations.
Back button focusing — why I never use the shutter to focus
As an aside, I always shoot using back (or front) button focusing which will be the subject of another blog.
Back button focusing separates the focus from the shutter and enables you to pre-focus very easily without then focusing again when you press the shutter. I found that once I’d started using it I never wanted to go back to doing it the “traditional” way. Google it for more information.
Camera Settings by Discipline
As a preface to this section I will point out that for a lot of these disciplines the settings will be very similar. The skill in photographing the separate disciplines is mostly in timing, position and framing, of which I have written more in other articles.
Cross country eventing — shutter speed, positioning, anticipation
For cross country we want our shutter speed quite high, but not necessarily as high as some other people suggest. Horse travel around cross country at between 20mph and 30mph, and we need to freeze that movement while panning (moving the camera with the horse) at the same time.
Lens: 70-200mm, 70-300mm, 100-400mm.
Shutter: 1/800s or higher. In low light on an overcast day or in the evening, you can get away with 1/500s if you pan well.
Aperture: f4 – f5.6 to ensure that at least the front half of the horse, and rider, are in focus.
ISO: Set the other two first and then change you ISO until you are happy with your test shots.
White Balance: Manual. Set for the lighting conditions. 5400K (sunny), 5800-6000 (overcast).
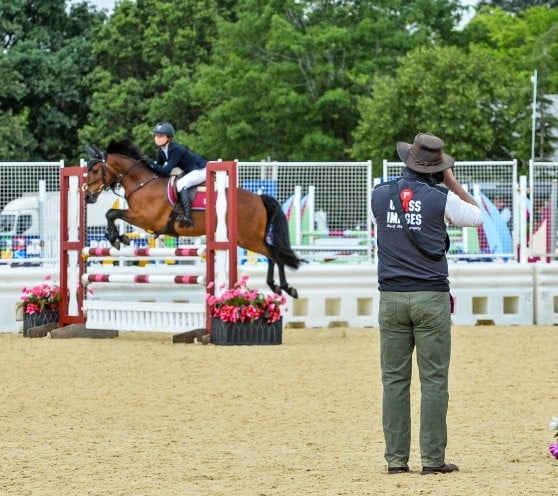
Showjumping — indoor vs outdoor, artificial light challenges
Two completely different sets of settings here. There is less emphasis on shutter speed as the horses are not galloping.
Indoors
Lens: 70-200mm.
Shutter: 1/800s or higher. You can get away with 1/500s if you pan well.
Aperture: f2.8 – f5 to ensure that at least the front half of the horse, and rider, are in focus.
ISO: Set the other two first and then change you ISO until you are happy with your test shots. YOu will be going quite high but a bit of noise is better than blur.
White Balance: Set it manually by taking test shots of something white and adjusting until the results also look white.
Outdoors
Lens: 70-200mm, 70-300mm, 100-400mm. Zooms are generally better if you want to get a variety of fences. If you are shooting for editorial and only need a fence or two then a 300mm or 400mm prime will be great.
Shutter: 1/800s or higher. In low light on an overcast day or in the evening, you can get away with 1/500s if you pan well.
Aperture: f4 – f5.6 to ensure that at least the front half of the horse, and rider, are in focus.
ISO: Set the other two first and then change you ISO until you are happy with your test shots.
White Balance: Manual. Set for the lighting conditions. 5400K (sunny), 5800-6000 (overcast).
Dressage photography — the settings change
Small dressage arenas (20m x 40m) can generally be covered by a 70-200mm or 70-300mm. High level 20m x 60m arenas will require a 100-400mm to cover the whole arena.
Indoors
Lens: 70-200mm, 70-300mm.
Shutter: 1/800s or higher. You can get away with 1/500s if you pan well.
Aperture: f2.8 – f5 to ensure that at least the front half of the horse, and rider, are in focus.
ISO: Set the other two first and then change you ISO until you are happy with your test shots. You will be going quite high but a bit of noise is better than blur.
White Balance: Set it manually by taking test shots of something white and adjusting until the results also look white.
Outdoors
Lens: 70-200mm, 70-300mm, 100-400mm.
Shutter: 1/640s or higher. In low light on an overcast day or in the evening, you can get away with 1/500s if you pan well.
Aperture: f4 – f5.6 to ensure that at least the front half of the horse, and rider, are in focus.
ISO: Set the other two first and then change your ISO until you are happy with your test shots.
White Balance: Manual. Set for the lighting conditions. 5400K (sunny), 5800-6000 (overcast).
Point-to-point and racing — a range of lenses
You can get away with a surprising range of lenses for horse racing because you can generally get quite close to the track and to the fences.
Lens: 35mm, 70-200mm, 70-300mm, 100-400mm, 300mm, 400mm. 500mm.
Shutter: 1/1000s or higher. In low light on an overcast day or in the evening, you can get away with 1/500s if you pan well.
Aperture: f4 – f5.6 to ensure that at least the front half of the horse, and rider, are in focus.
ISO: Set the other two first and then change you ISO until you are happy with your test shots.
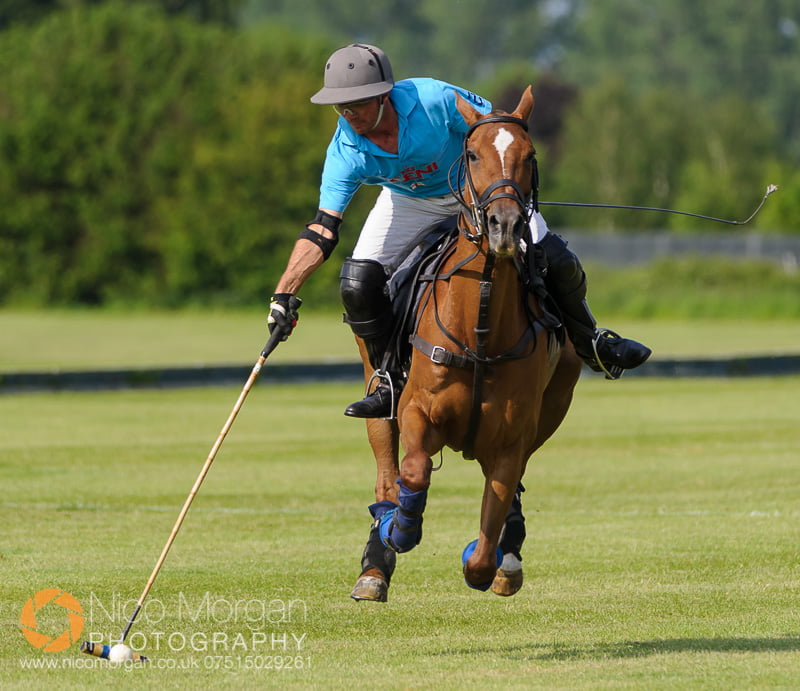
Polo — why your 70-200mm won’t be enough
Polo pitches are huge, 300 yards long and 160 yards wide, and the play moves all over it very very quickly. Long primes give great quality images but limit the parts of the field you can cover. Ideal lenses are long zooms with fast apertures like a 100-400mm f4 or a 200-400mm f4.
Lens: 100-400mm, 200-400mm, 400mm, 500mm, 600mm.
Shutter: 1/1000s or higher. In low light on an overcast day or in the evening, you can get away with 1/500s if you pan well.
Aperture: f2.8 – f5.6 to ensure that at least the front half of the horse, and rider, are in focus.
ISO: Set the other two first and then change you ISO until you are happy with your test shots.
Equine portraiture — slowing everything down
This is where the primes come in useful, because you are in control of the situation and can position the subject and yourself wherever you want. Use a focal length longer than 70mm to avoid distorting the horse’s features. Shutter speed can be lower because the subject isn’t moving.
Lens: 85mm, 135mm, 70-200mm, 300mm.
Shutter: 1/100s or higher.
Aperture: f1.2 – f5. Be careful with very wide apertures that at least the horse’s head is completely in focus.
ISO: Set the other two first and then change you ISO until you are happy with your test shots.
Common Mistakes and How to Fix Them
The biggest mistake you can make at the outset is to spend more money on your camera body and buy cheap lenses. Good lenses are expensive and cheap lenses can be terrible.
If you are in doubt, buy a good 70-200mm f2.8 secondhand from someone like MPB.com and then buy the camera you can afford to go with it. That lens will be useful for longer than the camera will.
I hope this has been useful. Please comment or suggest amendments below.
Learn equestrian photography from someone who has spent 35 years doing it professionally
Most equestrian photography courses teach equine portraiture and little else. This membership covers the full picture — dressage, eventing, showjumping, hunting, reining, vaulting and more — because real equestrian photography happens across every discipline, in every kind of light, at every level of competition.
These are the same methods I use working for clients including Land Rover, British Eventing, and Horse & Hound. Short focused courses and longer deep dives, all in one place, for a single one-off membership fee.
The membership is currently available at a significantly reduced founding rate while the full course library is completed. This price will not last.
About the Author
I have been a professional photographer for 35 years. For the last 20 years my work has been almost exclusively equestrian, working for clients like Land Rover Defender, Fairfax & Favor, Ariat, The Pony Club and The British Horse Society, to name but a few.
I have worked in various official capacities at the top equestrian events, including Burghley Horse Trials, Badminton Horse Trials, Bolesworth, Hickstead, Horse of the Year Show and Dublin Horse Show. My work has been published worldwide in books and magazines and I have had front covers of well over 50 national and international titles.
Further Reading
- Equine Portraits 101 – A primer for getting started with equine portraits
- The best websites for photographers – How to present your images online
- 11 “Rules” of equestrian photography – which photos of horses work and which don’t
- How to shoot jumping hoses in low light – how to deal with shooting in low light
- How to photograph horses – some professional tips.

30 comments
mirchevphotography
good site thanks for sharing
Calvin Downes
Hi Nico,
Your thinking about Mirrorless is a little out of date. For the past year or so, they offer lock-on and tracking capabilities surpassing all but and equalling the very top DSLRs …. just an observation.
I was looking at your site to get some pointers before going to a Trials event (for first time), predominantly what lens length is likely to be best. I was interested to see you suggested 70-200 for most situations, which I’m sure is valid for many ‘straight shots’. However, one of the shot types I was thinking of is similar to your top picture (if I can get into a suitable position, which may not be possible without a wireless release) … but – please tell me if I’m wrong, but I suspect that breaks most of your suggestions – it looks like a far wider angle than 70mm and I suspect it was taken with everything (ISO, speed, aperture and focus) set to manual with a pre-focus point, to avoid over exposure of horse and as I suspect continuous AF/tracking isn’t really beneficial here … for this specific type of shot … I appreciate no one setting/lens fits all cases – it’s all ‘horses for courses’ …
but as I say, this is one specific view I am hoping to get so am keen to get any pointers before I go.
Thanks for posting your suggestions and guidance.
nico
Yes, you might be right re focus speed, especially as it changes by the week these days. Having said that mirrorless technology offers me no advantages at this point in time, and battery use would still be an issue in most cases. Many of my colleagues continue to experiment with the latest mirrorless bodies and not really see any point in converting, as yet.
You’re right in thinking the top shot was remote and therefore an extra “bonus” to the usual shots. I would set those up with the Technical Delegate’s approval in advance of the first horse into the ring and then have to leave it where it was throughout the class. I fire these at the same time as a more normal longer lens shot via a radio release on the hot shoe. I usually use a 24mm for this, pre-focus on the point in which I want to capture horse and rider, switch off AF and use a high enough shutter speed to negate the need for panning (sometimes this is touch and go). With today’s SLRs my approach would be to set shutter and aperture in manual and use Auto-ISO, with appropriate compensation, to allow for changes in light levels.
The most important thing with all remote camera situations is to make sure the TD or fence judges are happy with where the camera is, that it is invisible to horse and rider and not in the way of the arena party.
Good luck!
Josh
What remote shutter do you use to trigger the camera from across the ring? Do you ever run into issues with rainfall mid class?
nico
Hi Josh.
I use Pocket Wizard Plus IIIs for this. The camera is covered in a clear bag if necessary but if it is wet I tend not to bother with remotes. They are a bonus after all. You can get covers designed for flash guns which work for PWs too.
Christopher Carrel
Hi Nico, some interesting points you’ve written in this article. I’m very much a hobbyist photographer but keen to learn more techniques with my recently upgraded Canon 5D mk4. I’m covering a showjumping clinic this weekend organised by a local Riding Club but hosted in an indoor school where the lighting is poor – it’s sodium lights giving off a very orangery glow.
The action shots of ridden horses going over fences won’t be too much of a problem with a fast shutter speed of 1/800 and a higher ISO. But after each hourly lesson the 4 riders in each class/group will want a photo of themselves on their horse with the instructor standing by the shoulder of the horse. Albeit static subject shots, I’m not sure which aperture setting to use because of the potentially 3 focal planes (the horse’s head/face, the instructor’s face and the riders face) at differing distances from the camera. The foreground will be the school surface and the background will be the external wall/boards of the school – both of which can be out of focus. Should I use an aperture of f/8 to get the subjects in sharp focus? Any higher then the shutter speed will slow down risking blur – its not easy asking a horse to stop moving its ears! Many thanks in advance.
nico
Hi Chris. Thanks for commenting.
Indoor jumping events are always a challenge, and will test the high-ISO performance of your new toy. 1/800 might be more than you need, though. If your panning skills are good, you might get away with 1/500s or even 1/400s which would facilitate a narrower aperture and greater depth of field during the lessons.
Your static shot question hits the nail on the head and raises one of the classic dilemmas. Remember the subjects should be pretty static so dropping your shutter speed down to anything you can hand hold should be workable. Working out the depth of field you have based on your lens and camera choice and distance from the subject enables you to use hyperfocal distance to include all of those focal planes. The background isn’t going to be pretty, so I think f/8 might be excessive. Remember you could use a flash for these static shots too, many event photographers do in this situation. Try to balance the flash colour with a suitable gel to match the sodium lighting if you can though, or the daylight-balanced flash will be very cold compared to the ambient lighting.
Hope that helps.
william childress
I have DSLR,Which is the best setting for photographing horses on the run? Also some one running?
nico
Hi William. Good question and, to some extent, the answer is “it depends”.
If the lighting is consistent then I would use Manual. I would set my aperture at something like f5, then choose an ISO which allowed me a shutter speed of 1/800s or shorter.
If the lighting is less consistent, e.g. the sun is in and out of clouds, then personally I would choose one of two options: aperture priority (something like f4 or f5 with ISO set so shutter speed doesn’t drop below 1/800s when the sun goes it) or Manual with Auto-ISO (set aperture and shutter speed and leave camera to change the ISO). Many will argue that shutter-priority is a more obvious choice, but I want a shallow depth of field and don’t want the camera changing the aperture to something like f11 when the lighting is bright!
In a nutshell, all of these will work. Try them out and see what suits you best.
The quick and easy method, if you prefer, is to use the sport mode setting. This should keep shutter speeds fast. Don’t forget to practise your panning.
John McNaughton
Hi Nico
Your advice is greatly appreciated and very helpful. I always use manual mode and more often set camera to f5.6 unless shooting upwards and only sky as backdrop then use f8. I use a Nikon D4s and traded my D4 in for D500, I regularly use auto ISO unless it’s a clear sunny day. I always ask permission from event organisers to attend, any events I attend I make a point of introducing myself to the official event photographer and let him/her know I have permission to attend and agreed with the organisers not to sell my images. I find he or she appreciate that and always willing to have friendly conversation, as an amateur photographer you must respect and understand they pay a considerable sum to be there. Do you ever find there is a time and place to use your camera in silent mode and would you use it?
nico
Hi John
I very much appreciate your comment and your attitude in general. Great to hear.
I have only used it on a very small number of occasions, normally for dressage indoors. Even then there was a general background murmur from people and tradestands so it was probably pointless! When using remote cameras in showjumping rings it is sometimes necessary to silence the shutter noise to satisfy the Technical Delegate, but in these situations a proper blimp is probably a better option.
Roger L. Clark
I live in Oregon, USA, where can I purchase your book – “Best Camera Setting for Horse Photography”?
Roger L. Clark
Hello again Nico, I am still interested in purchasing your book!! Any assistance will be greatly appreciated!!
nico
Hi Roger. Haven’t finished my book yet. Tou may be seeing a Pinterest image which looks like a book cover. Will let you know when I have completed it.
arthur uden
Nico, thank you for these ‘down to earth’ tutorials. Probably the best I have read to date. One question, which metering mode do you use? I follow a lot of local pony club days with my dslr. Having a jet black horse in the ring followed by a light gray can get me asking, should I use spot, centre weight, matrix?. It doesn’t help when the rider is wearing a dark jacket and has a background of dark trees. I guess the dark background is where an apeture giving a shallow dof will help.
nico
Hi Arthur
To be honest my usual metering setting is matrix, occasionally moving to centre-weighted in circumstances where the surroundings are much lighter or darker than the subject, and where lighting conditions are changing rapidly.
My camera is in full manual mode 80% of the time, manual + Auto ISO the rest. The reason for the latter is that Auto ISO on my Nikons allows variations of 1/6 of a stop rather than a third of a stop, as in the other modes.
When I am in full manual mode the light is fairly consistent or at least predictable, and I use predictable targets like green grass to meter from. Most of the time I place grass just to the right of the middle of the histogram and leave the exposure there, knowing it will be “correct” for horses of any colour.
Hope that helps!
arthur uden
Nico, could you get away with metering on the green grass, then locking the exposure via AE-L? I have BBF so have exposure lock assigned to a Fn button. I use a D7500. Thank you.
nico
You could work that way, yes, but you would want to have 1/3 overexposure dialled it, depending on the colour of the grass. I sometimes set AE-L to be activated on shutter half-press when using BBF (always) but a Fn button works just as well.
Adrian
Nico,
I am shooting indoors at Aintree Equestrian, using a Nikon d7200, i am finding above iso 4000 i get to much grain. I am using a Nikon 18/200 lens. I am finding the pictures are not as sharp as i would like, based on everything i have read I need at 70-200, but wonder if that will work any better indoors and its more my skill levels need to improve, as i have only just started with indoor equestrian.
I have a 70-300 but that’s even slower, so have not tried that.
nico
You won’t want to hear this but I shoot indoors up to ISO12800 sometimes, and have been known to drop to 1/400s (which really tests your panning skills) and this would be probably at f3.5 or f4 because I don’t like shooting wide open even with professional lenses.
In a nutshell, yes, a f2.8 70-200 would be a godsend, but you might still find grain a problem until you can get yourself an D4S or better. If you don’t shoot indoors too often then it probably isn’t worth the investment. To make you feel a little better, when I first started shooting as part of the official team at HOYS it took us quite a while to settle on the best combinations of cameras and lenses.
Best wishes
Lou Harrison
Hi Nico,
Thanks for your article, I really enjoyed reading it. I got into photography after owning one of the eventing websites and being so inspired by the good photo’s out there. I don’t really go to any equestrian events with my camera as the competitive nature of some of the photographers put me off, I’ll go along with a friend to her lesson or follow her at an event if time permits – it’s just a hobby for me. I always shoot in manual, am a Nikon girl and took auto ISO off at the end of last year. Two questions if you are still looking at this article. I have a basic entry level DSLR – the d3300 and a 70-200mm f2.8 lens, I struggle in low light to get sharp images without grain even if my ISO is only at a couple of thousand so similar to the comment from the reader above, when you say you need a D4s or better … is this because it’s a full frame camera and would this solve the issue?
Secondly, if taking a photo of a dog running towards me or i guess a horse jumping a fence, perhaps at f4 and 1/1250 sometimes my camera focuses on a blade of grass nearby or his tail by mistake, I shoot in AF-C and Dynamic area mode, my camera has 11 focus points from memory. Is this just unlucky, or can you suggest anything to stop this happening.
One more thing…. you mention panning, I don’t ever use this, when would you use this? A horse galloping past you from left to right perhaps? And what range of shutter speeds would you be using here?
Thanks v much and look forward to seeing many more of your great photo’s.
Nico
Hi Lou
Firstly let me apologise for the delay in approving your comment. Sadly my (normally accurate) spam plug-in, identified you as such and hid you from view but you are back now!
One of the big differences between cameras from entry-level up to what I call wedding-level and the pro cameras is low light performance. It isn’t needed by many so is seen by the manufacturers as a “pro” feature. Full frame certainly helps. Simplifying slightly but because each pixel on the sensor has more room, it performs better and you get less noise. Having said that, I read reviews of the D750 and D850 by a “top” wedding photographer before I bought them and was disappointed in the low light performance compared to the D4s/D5. It’s not easy, and for most, not that relevant. I shoot alongside a seasoned journo at HOYS every year who still shoots with a D3 and gets usable images, but because we don’t have the luxury of being able to shoot RAW (images are visible on the screens within minutes without any editing) then we have to good in-camera high ISO performance. This might help in your case, I don’t know.
A dog running at you head on is perhaps one of those times when Group AF or single point AF might be better than a dynamic mode, simply because the camera is guessing where you want to focus, whereas you know.
Panning sounds straightforward i.e. simply moving the camera with the horse as it moves across you in either direction, so that the relative movement of the horse i.e. with respect to the camera, is minimal. Panning in low light means less chance of motion blur at low shutter speeds but can also create nice effects when used at deliberately slow speeds, like 1/125s for example, to blur legs while keeping the rider relatively sharp.
Hope that helps but come back if I can help some more.
Raina
Hi Nico,
Thank you for this article its really helpful!
I’m from Australia and when photographing as horsing events I have noticed that the lighting is always inconsistent, am I better off just using auto ISO or manual mode?
Nico
Hi Raina
It sort of depends. If the light is really inconsistent then I might shoot Auto-ISO for ease, especially during a long competition day when concentration might wane. For a light grey I might adjust exposure compensation to +1/3 or even 2/3 depending on how much of the frame a horse was filling. Likewise, a for a dark horse you might underexpose deliberately by 1/3 and let the camera do the rest.
Those tricky light days are when I switch between manual and Auto-ISO sliding during the day.
Nico
Michael Centofanti
Just came across this article and hopefully you can help. Photographing my daughter at her equine shows outside in the sun no issues. Today under a covered arena that was dark but it has no side walls so most of the sky and surroundings came off as lite white. I am using a Canon 5D MK IV with a 70-200 F/2.8 lens, in manual mode tried ISO 100,200 and 400 but the shots are dark. My shutter was from 1/500th to 1/1250th and most where not blurry. Hopefully I made sense and any help is appreciated as this is the 2nd time at this same arena I have had problems. If possible I could send a photo. Thanks for you time
Nico
Hi Michael, thanks for commenting.
Let’s address these points in turn. The reason the sky and surroundings in the background are white is because you are exposing your photo for the dark interior of the arena. As a result the much brighter outdoor scene is being massively over exposed. In the situation you are shooting in this is not a problem and shouldn’t be a concern for you – we need to concentrate on the subject matter, which is your daughter inside.
Your choice of equipment is good but we are going to have to push the settings much further I suspect. Make sure you are shooting RAW images so you have more scope for editing afterwards. Try pushing your ISO to 1600. You may get more grain but the images should be much lighter and sharper. You don’t say whether you are taking moving images or just static shots when she is stood still but I would look for a shutter speed up around 1/500s if she is moving, this could be as low as 1/200 if she is still. No lower or your hand shake will start to affect the results.
I was shooting in an indoor arena last weekend (blog post coming but have to wait for publication first) and it did not have open sides but have some light coming in through skylight panels in the roof. My settings were 1/500s at F4 and ISO was about 4000 (but I am shooting with a camera which is very good in low light) and this was just enough to freeze the hooves.
I hope this helps.
Jean-Baptiste Grenouille
Hi Nico… Have you moved to the Nikon Z9? If yes, any hint on focus settings for eventing?
Nico
I haven’t and probably won’t at this stage – various reasons.
My focus settings for eventing would usually be AF-C D9 or Single, very occasionally Group.
Hot Horse
I found your article on the best camera settings for horse photography to be incredibly helpful. As an equestrian myself, I love to capture the beauty and grace of horses on camera, but I often struggle with getting the right settings. Your tips on aperture, shutter speed, and ISO were very informative and I appreciated the examples you included.
One thing I’ve noticed when taking pictures of horses is that they can be quite active, making it difficult to capture a clear and focused image. Do you have any advice for photographing a hot horse who might be moving around a lot?
Thank you for sharing your knowledge and expertise on this topic!
Nico
Hi there
You are very welcome.
Yes, “hot” or flighty horses can be difficult to keep sharply in focus so it comes down to the right choice of Autofocus Mode and Autofocus Area. Depending on your choice of equipment manufacturer I would choose continuous or servo mode to ensure that the camera is constantly focusing as long as your shutter release or back button are pressed. Secondly I would use a larger area to autofocus on. Using a single point or small area it is easier for the focus point to move away from the horse as it moves around, so use a group, larger area or even an eye-detection mode if your camera provides one and you trust it to find a horse’s eye effectively.